Showing posts with label 8x6. Show all posts

Wednesday, 30 April 2014

How to fit a 6x4 greenhouse base

Fitting your aluminium greenhouse base is one of the most important jobs to get right, read on to find out more
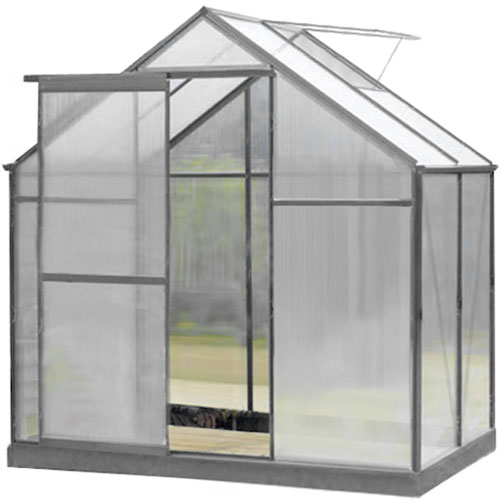
This is not a 6x4 greenhouse :)

Your free base looks a bit like a very low table without a top, there are three different ways you can fit it depending on what is going to be best for your requirements and 6x4 greenhouse location

1. The legs on your base can be used to hold your greenhouse in place by digging a shallow foundation for the base to sit in then four deep holes at each corner to place the base legs in. Make sure you base is completely flat at all times. Then fill the holes with concrete for a very secure hold. This is especially useful if you wish to place your greenhouse directly onto soil. It allows you to grow in the soil inside your greenhouse. If this is what you are going to do replacing the soil every two years or so will keep it in the best growing condition

2. Build a brick wall or use screwed in wooden batons to make a plinth and bridge the gap between the four legs, this will raise the overall height of your greenhouse. If you are using bricks it's well worth going for an engineering brick, your 6x4 greenhouse will last many years and you don't want to find that breeze blocks or regular bricks are crumbling underneath you! Place the base directly on to your plinth and screw it into place. The benefit of this method is a taller greenhouse, useful if you yourself are tall but especially useful if you wish to grow climbers, tomatoes or vines as it gives you lots of extra head room inside.
Alternatively you can use the height gained to install raised beds or staging reducing the need to bend whilst maintaining the all important height.
The down side of this method is that you will have to step into and out of your greenhouse although a ramp or steps can easily be installed

3. If you have a concrete or slabbed area for your base just cut the legs off the 6x4 greenhouse base and use a masonry drill and raw bolts to screw it into place

Whichever method suits your greenhouse and garden best all these solutions should give you a very secure base to help your greenhouse give you many years of gardening pleasure

Laura

Wednesday, 23 April 2014

Tips for sucessful growing in your 6x4 Aluminium Greenhouse

Now that spring is well underway and your 6x4 greenhouse is poised for action here are some tips to take you through the next few months. Read on to get the best out of your greenhouse

Temperature control

The temperature in your 6x4 aluminium greenhouse is crucial to your plants. Too cold or too hot and they will suffer. One of the easiest way to control the temperature with little effort on your part is to fit a heat sensitive vent or window opener. Once fitted you vent opener will open and close automatically depending on how hot or cold it is inside your greenhouse. If you want to raise the humidity in the greenhouse place a tray of water on the floor or just hose down the floor and allow it to evaporate. 
Keeping a watering can full of water in the greenhouse will help increase humidity but also means that you wont risk shocking plant roots with cold water straight from the tap

All round maintenance

Keep on top of potting on your plants and thinning out to give them the best possible chance and don't let the soil or compost dry out. The best time to water your plants is first thing in the morning or late evening to avoid the risk of scorching your plants.
Feed plants as required and pull out weeds as soon as you spot them, well trained small children can be handy for this job for the price of a chocolate bar.
Ooh, snazzy greenhouse...okay, not really!
Make sure your 6x4 polycarbonate greenhouse panels are clean to make the most of the spring sunshine. You want to get as much heat inside as you can early on. Once summer is underway you may want to think about shading one side of the greenhouse with netting if the greenhouse is in a particularly sunny spot.
My favorite solution for dealing with pests has to be getting small children (it's handy to have a ready supply) to collect ladybirds and pop them on infected plants. Birds will also help by eating naughty pests so encourage them into the garden.

Your 6x4 greenhouse is a great place to get your plants and veggies growing but it's also ideal for a bit of experimentation. Why not pop something a bit more exotic in there like Okra, Sweet Potatoes, or even Melons? Above all have fun.

Until next time - Laura

Wednesday, 18 September 2013

Protect your plants this winter with 6 x 4 greenhouse

Don’t let the winter frost ruin your gardening efforts from the summer. Protect your plants with 6x4 greenhouses

Those that are not keen gardeners will not understand nor appreciate the hard and time consuming task of creating beautiful gardens and healthy plants. Home owners through-out the UK will have spent hours and hours this summer cultivating, pruning and watering their plants and gardens. As is often the case, you get out what you initially put in and gardening is no exception.

The wonderful weather here in the UK this summer has allowed plants to thrive and gardens to really blossom. However, summer is always short lived. It won’t be long until we are reaching for our winter coats and donning hats, scarves and gloves. Don’t let the winter frost damage your hard work from this summer; invest in 6x4 greenhouses to protect your plants this winter.
Once the frost arrives, your beautiful plants will become limp and blackened. Surprisingly, even hardy plants and tough evergreens can be damaged by prolonged spells of severe frost. The cold weather causes the soil to freeze and so the plant roots are unable to take up the water which results in the plants dying due to lack of moisture. It is therefore highly advisable to protect your plants to attempt to minimise the damaging effects of the cold.

Whilst 6x4 greenhouses create fantastic growing environments during spring and summer, they are also ideal for nurturing plants during the winter season. All pot plants should be moved into the greenhouse, however, it is not always possible for all plants to be grown in pots. Take cuttings of plants that cannot be transferred into pots so that these can be grown in the greenhouse over winter, ready for planting in spring.

Keep your plants warm through autumn & winter
For more information on our 6x4 greenhouses or 6x6 greenhouses, just pop to our website. It is also worth noting that it isn't solely plants that are damaged by the frost during the winter months. Ensure that your patio furniture is also protected. Browse our website for covers, including parasol covers, & barbecue covers to protect your garden furniture ready for next year’s summer months

Tuesday, 18 June 2013

Building your Aluminium Greenhouse - the final stage!


Congratulations. You are now ready to erect your Aluminium Greenhouse...and you might be feeling just a tiny bit nervous! (If you missed the first stage just click here)

Don't worry, it can look a bit daunting but by taking your time, having a little patience, and some common sense you'll have it finished in no time

Tools required
·        Instructions
·        Spirit level
·        Screw driver
·        Tape measure
·        Small size socket set
·        Hammer
·        8mm Spanner
·        Lubricant
·        Silicon sealent
·        2nd pair of hands
·        Gloves

You may not need some of the items on the tools list and you might find other tools that really help, let me know if you do and I'll add it to the list

First off your Greenhouse is made of Aluminium and is therefore versatile, long lasting, and importantly at this stage it's light weight. The panels whilst large are going to be fairly easy to move around and put in position with a helper

Start by gathering all your nuts, bolts, and fixings in a large box. This will help you to keep them all in one place and make it much less likely that you will drop a crucial bolt on the grass where it will no doubt vanish in the blink of an eye!

Check the instructions and lay out your components in the order you are going to need to fit them

When you are laying out your base make sure your door piece has the groove at the front, sounds obvious now but trust me many a DIY'er has fallen at this first hurdle. Equally important, put your door grove on the side you want to fit your door. I received a lovely email from a customer who loved his greenhouse but felt it a shame we had fitted the door at the back!
Follow each step closely and keep checking back to make sure you are still on the right track. Trust me, back tracking can be really difficult and frustrating!

Use the lubricant to help you slide the components together, it's not essential but will make it that bit easier, especially for the gutters

Before inserting each panel apply some silicon sealant at the bottom of the frame, and again at the top, this will help to prevent mould growing inside the double glazing and looking unsightly. Once you have your Aluminium greenhouse built add some silicon sealant all around the polycarbonate panels to help insulate your greenhouse and prevent wind from blowing inside The guttering on the greenhouse gives you the ideal water collection point, just pop a water butt underneath

Other additions to your greenhouse can include heaters, irrigation systems, fans, window vent openers, thermostat, thermometer, and staging or shelving

Home grown veg - simply the best
Your nearly on your way to tasty home grown grub or beautiful blooms.

If you haven't seen the first stage of this blog just click here

Happy gardening, Laura

Wednesday, 22 May 2013

Erecting your Aluminium Greenhouse – For the reluctant DIY’er and competent handyman

We have all been there, you finally take the plunge and order your brand new greenhouse and wait expectantly for it to arrive. Better still you can save a lot of money if you put your aluminium greenhouse up yourself. Finally the big day comes and you want to get started right away so you can start filling it with all your lovely plugs, pots, plants, and seedlings....but wait! First read this for the best guide to erecting your 4x4, 6x4, 6x6 or 6x8 greenhouse quickly and efficiently....the first time.

Ok, I’ll start with the obvious ones, they may sound simple but get these wrong and you may find yourself pulling your hair out.

Choose a site that is as sheltered as you can get for your plot, gale force winds are not your greenhouses friend! The shelter will also keep the temperature up inside your greenhouse at your most important times in spring and autumn

Your best bet is to locate your greenhouse so you can fit all the way around it so that you can keep the panels clean, if it’s next to a path make sure you leave space to fit through with a wheelbarrow

Clear any overhanging branches and avoid growth overhead where possible. This will prevent leaves clogging your gutters, sap and insects dirtying your panels, and allow the maximum amount of light and warmth into your greenhouse

Get your base area ready, it needs to be nice and flat (use a spirit level) and if you are digging a foundation you can do this beforehand. To make sure your base is square rather than a parallelogram measure across the diagonals, these should be equal
Some people put down a stone, brick or wooden foundation to screw the base into for extra wind protection

If you are tight on space erect your greenhouse and base where you have plenty of room. Without the panels you will then be able to lift it to its correct location

Aluminuim polycarbonate greenhouse
Make sure you erect your greenhouse on a calm day, trying to fit panels in any kind of breeze will just make everything more difficult

When you open your box make sure you have all the correct bits

Read the instructions carefully, and then read them again!

Have a helper on hand, even a confident DIY’er will need a second pair of hands at some point

Make sure you have given yourself enough time to build your greenhouse. Some of our customers can do it in 4 hours others take a couple of days. To give yourself the best chance start early in the morning to reduce the chance of having to leave it mid way (and letting nature have a go at it!)

That’s all I’ve got time for right now but good luck and have fun. I’ll be back with the next stage of putting your greenhouse up next month

The next installment is up, just click here to go straight to it, hope you like it